
10 Real-World Selenium Automation Projects for Beginners
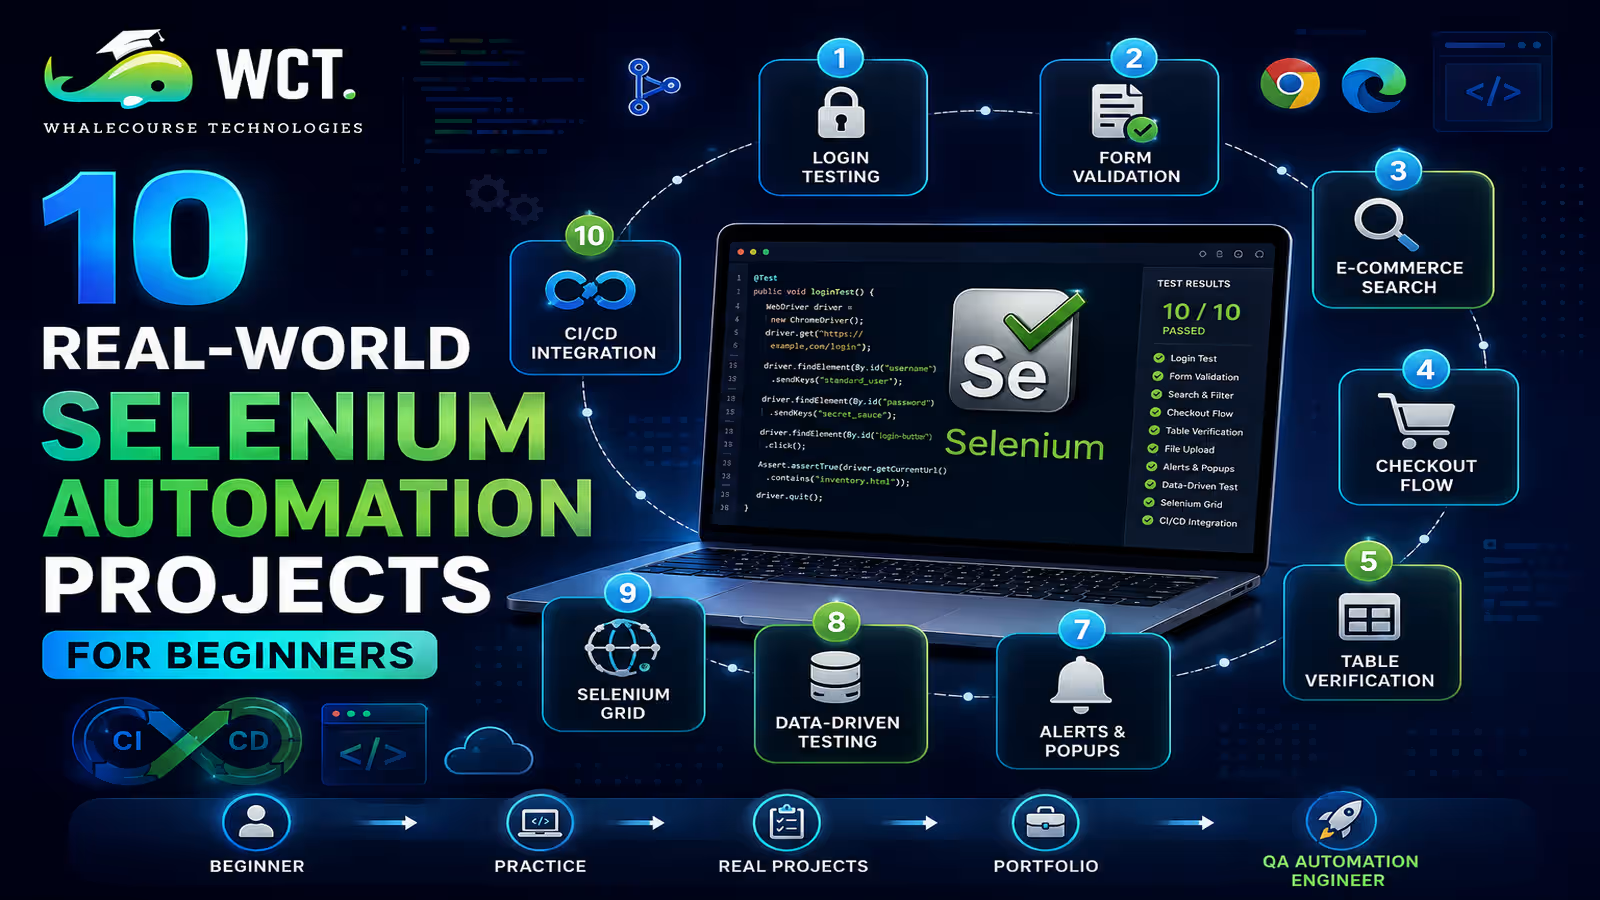
Selenium automation projects are the fastest way to build practical skills that employers actually care about. Reading about Selenium and watching videos is a good starting point, but the gap between understanding how Selenium works and being able to write reliable, maintainable test automation from scratch is only bridged through practice on real websites with real problems. This guide gives you ten concrete Selenium automation projects for beginners, ordered from simpler to more complex, with clear guidance on what each project teaches you and how to approach it.
What You Need Before Starting These Projects
Before building any of these Selenium automation projects, confirm your environment is set up correctly. Install Java JDK 17 or later, or Python 3.10 or later depending on your language preference. Install an IDE — IntelliJ IDEA Community Edition for Java or PyCharm Community Edition for Python are both free and work very well for Selenium development. Install the Selenium library through Maven (add the selenium-java dependency to your pom.xml) or pip (pip install selenium).
For browser management, Selenium Manager — built into Selenium 4.6 and later — automatically downloads and manages ChromeDriver and GeckoDriver for you. You do not need to manually download browser drivers anymore. Just install the latest Selenium version and it handles driver compatibility automatically. Verify your setup by writing a ten-line script that opens a browser, navigates to google.com, prints the page title, and closes the browser. If that works, you are ready for these projects.
Project 1: Login and Logout Automation
The login flow is the most fundamental user journey in almost every web application, which makes it the perfect first Selenium automation project. Use the Selenium practice site at the-internet.herokuapp.com, which provides a login page specifically designed for automation practice.
Your project should cover three test scenarios: a successful login with valid credentials, a failed login with an incorrect password, and a failed login with a username that does not exist. For each scenario, write assertions that verify the expected outcome — the correct URL after successful login, the correct error message text after failed attempts, and the visibility of the logout button after authentication. This project teaches you element location using ID and XPath, sendKeys for text input, click for button interaction, and getText for verifying displayed content. It also introduces the concept of explicit waits, which you will need when the page takes a moment to update after login.
Project 2: Form Validation Testing
Registration forms are present in virtually every web application and are one of the highest-value areas to automate because form validation bugs are extremely common and often caught late in manual testing cycles. Use a practice registration form — demoqa.com/automation-practice-form is a good option — or any publicly available registration form.
Build tests that cover multiple validation scenarios: submitting with all fields empty and verifying that each required field shows an error, submitting with an invalid email format, submitting with a password that does not meet complexity requirements, and submitting with all valid data and verifying the success confirmation. This project introduces you to handling different input types — text fields, dropdowns using the Selenium Select class, radio buttons, checkboxes, and date pickers. It also teaches you how to write reusable helper methods that fill in form sections rather than duplicating the same code across multiple test methods.
Project 3: E-Commerce Search and Filter Testing
Search features are among the most essential functions in e-commerce applications. A broken search or filter directly reduces sales. Use saucedemo.com — a practice e-commerce site built specifically for Selenium automation projects — as your test target for this project.
Build tests that verify searching returns relevant products, filtering by category returns only products from that category, sorting by price low-to-high returns products in the correct order, and adding a product to the cart from the search results page works correctly. This project introduces you to working with lists of web elements using findElements (plural), iterating through results to verify their properties, and handling dynamic content that changes based on filter selections. It also introduces the practical challenge of writing assertions for collections — for example, verifying that all product prices in a sorted list are in ascending order by extracting each price, converting it from a string to a number, and checking that each value is greater than or equal to the previous one.
Project 4: Shopping Cart and Checkout Flow
The checkout flow is the most valuable user journey in any e-commerce application. Bugs in this flow translate directly to lost revenue, which is why automating it thoroughly is a standard expectation in any serious QA role. Continue using saucedemo.com for this project.
Write a complete end-to-end test that logs in, adds two specific products to the cart, navigates to the cart, verifies both items are present with correct names and prices, proceeds through checkout, fills in the customer information form, verifies the order summary shows the correct total, and completes the purchase. Include a negative test that tries to proceed through checkout without filling in required fields and verifies the appropriate error messages appear. This project is where you start thinking about the Page Object Model (POM) design pattern — organizing your code so that each page of the application has its own class containing the element locators and methods specific to that page. Applying POM to this multi-page flow makes the benefits obvious immediately.
Project 5: Table Data Verification
Many web applications display data in HTML tables — dashboards, admin panels, reporting interfaces, and data management tools all use tables extensively. Automating table verification is a skill that comes up constantly in real projects. Use the-internet.herokuapp.com/tables for practice.
Write tests that read all the data from a specific column and verify it matches expected values, search for a specific row by the value in one column and verify the value in another column of the same row, verify the total number of rows in the table, and verify that the table is correctly sorted when a column header is clicked. This project teaches you a critical locator technique — constructing XPath expressions that navigate table structure using axes like following-sibling and parent to find cells relative to other cells. It also introduces the concept of scraping table data into a data structure (like a list of maps) for comparison-based assertions, which is a common requirement in financial and reporting applications.
Project 6: File Upload Automation
File upload is a feature that many beginners avoid automating because it looks complex, but Selenium handles it elegantly when the upload element is a standard HTML input of type file. The-internet.herokuapp.com/upload provides a clean practice page for this scenario.
The key insight for this project is that you do not need to click the upload button and then interact with the operating system’s file dialog. Instead, you use sendKeys on the file input element to send the absolute file path directly — Selenium handles the rest without opening any dialog box. Write tests that upload a text file and verify the filename appears in the success message, upload a file that exceeds the size limit and verify the appropriate error is shown (if the test site supports this), and upload different file types to verify that format validation works correctly. This project teaches beginners that many apparently difficult automation scenarios have a simple Selenium-native solution if you understand what is actually happening in the HTML.
Project 7: Handling Alerts, Popups, and Modal Windows
JavaScript alerts, confirmation dialogs, and prompt popups appear in many web applications, particularly for destructive actions like deletions or confirmations. They require special Selenium handling because they are not part of the HTML DOM — they are browser-level dialogs. The-internet.herokuapp.com/javascript_alerts provides all three types to practice with.
Write tests for each alert type: accept a simple alert and verify it was shown, dismiss a confirmation dialog and verify the action was cancelled versus accepting and verifying the action proceeded, and handle a prompt dialog by typing text into it and verifying the text appears on the page. For CSS-based modal windows that are part of the page HTML — unlike browser alerts — you use standard Selenium element location but need to wait for the modal to become visible before interacting with it. Include a test for the bootstrap-style modal on the-internet.herokuapp.com/modal_dialogs. This project significantly expands the range of real-world scenarios your Selenium automation can handle.
Project 8: Data-Driven Testing with External Test Data
Data-driven testing is the practice of running the same test logic multiple times with different input data. This is essential for efficiently covering many scenarios without duplicating test code. Return to your login test from Project 1 and extend it into a data-driven test.
Create a CSV file or a data class containing multiple credential combinations — valid credentials for the standard user, valid credentials for the locked-out user, an invalid password for the valid user, and completely invalid credentials. Use TestNG DataProvider in Java or pytest parametrize in Python to run your login test method once for each row of test data, with the test automatically asserting the correct outcome for each set of credentials. This technique transforms a single test method into comprehensive coverage of many scenarios with minimal additional code. In real projects, the test data typically comes from Excel files, databases, or JSON configuration files rather than hardcoded values, so practice reading from a CSV using Java’s Apache Commons CSV library or Python’s built-in csv module.
Project 9: Cross-Browser Testing with Selenium Grid
Cross-browser testing ensures your application works correctly across Chrome, Firefox, and Edge. In enterprise QA environments, this is a standard requirement. Selenium Grid lets you run your test suite against multiple browsers simultaneously by distributing test execution across multiple machines or browser instances.
For this project, set up a local Selenium Grid using Docker. Download the selenium/hub and selenium/node-chrome and selenium/node-firefox Docker images, start them with a docker-compose file, and configure your tests to connect to the Grid hub URL instead of launching a local browser. Modify your existing login and checkout tests to run against both Chrome and Firefox nodes simultaneously. After running the tests, open the Grid console at localhost:4444/ui to see which tests ran on which browser node. This project introduces Docker fundamentals alongside Selenium and teaches you how to configure RemoteWebDriver — a core Selenium class used in virtually every cloud testing environment, including BrowserStack and Sauce Labs.
Project 10: Full Test Suite with Reporting and CI Integration
The final project ties everything together into a professional-grade Selenium automation framework that could be presented in a job interview or included in a portfolio. This is the project where you combine everything from the previous nine into a cohesive, well-structured framework.
Structure your project with the Page Object Model pattern across all pages, organize tests into logical packages, add an Extent Reports or Allure reporting integration that generates an HTML report with screenshots of failures, configure all tests to run headlessly (without opening a visible browser window), and add a GitHub Actions workflow file that runs the complete test suite in headless mode every time code is pushed to the repository. The workflow should publish the Allure report as a GitHub Pages artifact so anyone can view the test results in a browser without downloading anything.
This capstone Selenium automation project is built to showcase the core skills that employers regularly expect from QA automation engineers, including POM-based framework architecture, cross-browser testing, test reporting, CI pipeline integration, and well-organized, maintainable automation code. When you have completed all ten projects and can explain every decision you made in the framework, you will have a portfolio that demonstrates more practical competence than most candidates with the same amount of time invested in course-watching alone. These Selenium automation projects are the difference between knowing Selenium and being able to work with it professionally.
Start Your Data Analytics Career Today
Join WhaleCourseTechnologies for affordable training with hands-on projects and placement support.
Conclusion
These ten Selenium automation projects progress from basic element interactions to a production-quality framework with CI integration. Each one builds directly on the skills from the previous projects, so the sequence matters. Do not skip ahead — the habits and patterns you develop in the earlier projects are exactly what the later projects depend on.
When you have completed all ten, push every project to a public GitHub repository, write a clear README for each one explaining what it tests and why you made the design decisions you did, and include the CI pipeline badge showing passing tests. That collection of repositories is a stronger demonstration of your Selenium automation skills than any certification, and it is what distinguishes serious candidates in a competitive job market for QA automation engineers.
In This Article
Enroll in Our IT Courses
Master IT Program at whalecoursetechnologies
- Expert Mentorship from IT Professionals
- Job-Ready Skills with Live Projects
- Career Boost Add-on Modules
- 100% Placement & Interview Support
